 Your website comes with an easy-to-use editing dashboard. It includes a lot of features, but let’s get you started with the basics…
Logging-in:
To find the login screen, firstly enter your website’s address into your browser, with /login at the end. For example, yourwebsite.co.uk/login.
Your username and password details may have been sent to you by Primary Image.
Or, you may have received a message from the website containing your username, but asking you to choose your own password. (If you were expecting an email, but you haven’t received it, please check your email account’s junk/spam folder!).
If you forget your password in future, there’s a “Lost your password” link on the login screen. Here, you will need to enter your username or registered email address, and a password reset link will be emailed to you within a few minutes. (Again, please check your email account’s junk/spam folder!).
After you’ve logged-in, you’ll see the website’s dashboard. On the left-hand side of your screen, a menu gives access to various sections.
Posts:
This is where you write your blogs or news articles. For most websites, this is typically where you’ll be adding most of your new content.
Click “Add New” and you’ll see a headline box and main body box. We recommend keeping your headline as concise as possible.
The URL for your post is automatically generated from your headline. It’s best to keep your page URLs short, which makes them easier to share, so here’s how to edit your addresses.
You can also change the associated date for an article, for example if you want to back-date an announcement, or schedule an article for future publication.
Adding quotes to your press release? You can adding formatting to these!
Once you have published a post, the headline is automatically added to an index page on your website (and sometimes in other places too, such as your website’s footer). Often an excerpt of the article is displayed too, which contains the first few words of your post:

On most websites, you can choose a featured image, which basically is a thumbnail associated with your post. These thumbnails are typically displayed in your news index, shown against each headline.
If your website allows visitors to leave their comments on your posts, see our comment moderation article.
Pages:
This is for your main information pages, such as your Home page, About page, Contact page, etc.
For most websites, typically we will have set you up with some pages already, using content you supplied to us. You can find these under the “Pages” index screen.
 For most websites built by Primary Image from 2021 onwards, your website will have a new-generation page building system called “Beaver Builder”. See our guide on using this editing system. You may find it easier to duplicate an existing page design, then replace the content as appropriate, rather than starting a new page design completely from scratch. We also have more guides on using Beaver Builder.
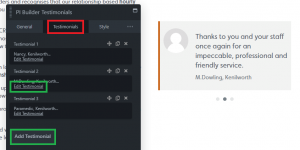
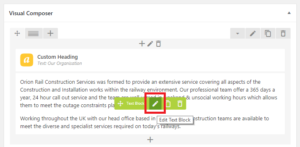 Websites created by Primary Image prior to 2021 will typically have a grid system called WPBakery Page Builder (which looks like the thumbnail to the right). Here’s how to edit your text within the grid layout. And we have a list of other useful guides on WPBakery Page Builder too.
If you’re unsure which guides apply to your website, please ask Primary Image and we’ll help you find the relevant instructions.
Certain pages have content pulled into them automatically, so for instance if you have a News or Events index, there’s normally no need to touch these pages. They are automatically updated by the system.
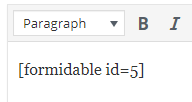
In some places, you might also notice some special codes. Be careful not to touch these, as they tell your website to insert functions, such as displaying a contact form:
See our separate guides on adding videos and files (e.g. PDFs) to your website.
General editing tips:
See our step-by-step instructions on adding links into your pages.
It’s good practice to split long pages into sections by using subheadings. See also how to add spacing gaps between sections.
To add pictures to your website, see our guide on uploading images. We recommend using your own image editing software to resize your images, before they’re uploaded to your website.
When copying and pasting text into your website from other sources (e.g. from an email), be careful if it picks up any strange formatting. Read our tips to prevent this happening.
On most editing screens, there are “Preview” and “Save Draft” buttons on the right-hand side:

When you’ve finished editing a page or post, click “Publish” (or “Update” if you’ve already published your page):
![]()
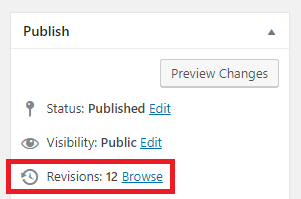
If you ever accidentally delete something, you can sometimes roll-back your edits by looking for a “Revisions” link on the right-hand side menu (when this facility is available):
Media:
This area simply lists all the pictures and files you’ve uploaded to the website for reference purposes:
Forms:
Where your website has a contact / enquiry form installed, you will normally find a list of all the entries saved in your website dashboard. You can export enquiries as a spreadsheet file if needed.
When visitors use a contact form on your website, their messages will be sent via email to you. We do, however, recommend testing these messages are being accepted by your email provider, because sometimes your email program will mistakenly put them into your spam/junk folder.
Advanced Modules:
Some websites may have additional modules installed. If this applies to your website, we will let you know.
For example, your website may have an events system, file listing tables, a team module, or job vacancy listings.
Your Profile:
Here you can change your password. We recommend you choose a secure password, otherwise your website could be at risk of being attacked.
It’s also really important to keep your email address up-to-date, because this will allow you to reset your password should you ever forget it.
You may instead find this page under the “Users” menu, if it’s enabled on your site (see below).
Users:
If you have multiple editors or customers logging into your website, you may see a “Users” menu.
See our guide on adding, editing and deleting users.
If you have different users making edits to pages or posts at the same time, they’ll see a lock notification.