Please note: this guide only applies to webpages which use the WPBakery Page Builder.
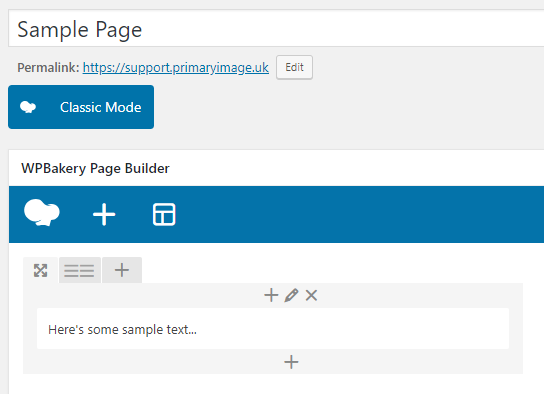
WPBakery Page Builder screens look like this:
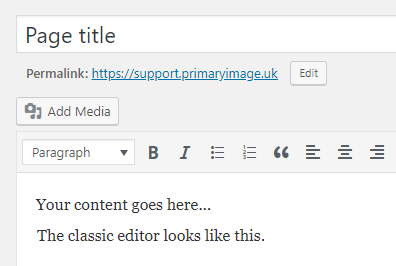
If your editing screen looks like this below, then this guide doesn’t apply to you. Instead, see our separate guide adding images using the classic editor:
Adding a single image with WPBakery Page Builder:
- Firstly, if you have a large image, resize it on your computer, before it’s uploaded to your website. Large image files (e.g. straight from a digital camera) may be several megabytes in size and can increase the loading time of your webpages for visitors.
- Next, ensure WPBakery Page Builder is activated on your page. If it’s not, you’ll see a button like this:

- If necessary, setup rows and columns on your page, so you can create your desired page layout.
- Click on the + icon to add a new element.

- Add the “Single Image” block.
- On the popup screen, add your image into the box indicated below in red:

- Ensure the “Upload Files” tab is displayed, then either drag and drop the image file from your computer into the screen, or click the “Select Files” button.
- Your image will upload within a few seconds.
- Alternatively, if you want to use an image file that’s already been uploaded to your website in the past, click on “Media Library” instead.
- Generally using the “full” image size should be fine (indicated above in green), as long as your image file is suitable for web use. Or you can type “medium” into here to display your image smaller.
- Choose your image alignment (highlighted above in purple). In most cases, it looks best to centrally-align your pictures, rather than left or right.
- Then, click “Save changes“.
- You can now preview your page:

Adding links to your images:
- In the image editing dialog, under “On click action“, choose “Open custom link” (in red below):

- Add a URL into the “Image link” box (indicated in green above). This can be a file link, such as a link to a PDF or Word file.
Editing your block:
If you need to edit an existing image block:
- Hover your mouse over the block.
- Click on the “Edit” icon, as indicated in red below:

- You’ll then see the editing screen.
If you’re using text blocks:
Within WPBakery Page Builder, if you’re using text blocks, you can insert images straight into these paragraphs, rather than using a separate image block. This may be ok for simple layouts. To do this, follow our separate guide on using the “classic editor”.
Adding image galleries:
If you want to display multiple images, then use the Image Gallery block:
- Ensure WPBakery Page Builder is activated on your page. If it’s not, you’ll see a button like this:
- If necessary, setup rows and columns on your page, so you can create your desired page layout.
- Click on the + icon to add a new element:
- Click on “Image Gallery“:

- In the popup screen, under “Gallery type“, choose “Image grid“:

- Next, choose your gallery images by clicking on the area indicated in green above.
- Ensure the “Upload Files” tab is displayed, then either drag and drop the image file from your computer into the screen, or click the “Select Files” button.
- When uploading lots of images, please be patient as this may take a while to upload and process.
- Alternatively, if you want to use image files that have already been uploaded to your website in the past, click on “Media Library” instead.
- For the pictures you want to use in your gallery, ensure the images have a tick next to them, as indicated in the sample below (where four images have been ticked). Simply click on images to tick / untick them:

- Next, click on the “Add Images” button.
- If necessary, you can change the order of your images by simply dragging them into a different order:

- Choose how many columns to use for your image gallery. Typically, we recommend using two to four columns, but you may want to experiment to find out what works best for your scenario:

- In the “Images width/height ratio” setting, you might want to experiment with what works best, but typically the 3:2 ratio is good for photos.
- Click on the “Save changes” button at the bottom of the dialog.
- You should now preview your page:
- You can then publish the page.
Editing an existing image gallery:
- In the editing screen, hover over your existing “Image Gallery” block and click the “Edit” icon:

- In the “Images” section, click on the “+” button as indicted in green below:
- Ensure the “Media Library” tab is displayed, then drag-and-drop your image file(s) from your computer into the screen. When uploading lots of images, please be patient as this may take a while to upload and process.
- For those pictures you want to use in your gallery, ensure the images have a tick next to them, as indicated in the sample below (where four images have been ticked). Simply click on images to tick / untick them:
- Next, click on the “Add Images” button.
- If necessary, you can change the order of your images by simply dragging them into a different order:
- Click on the “Save changes” button at the bottom of the dialog.
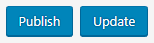
- You can now “Publish” or “Update” your page:
Adding links to your image galleries:
If needed, each image within your image gallery can have its own clickable link to a specific website or page. This can be useful if, for example, you have a list of logos, and want each logo to link to a third-party website.
To do this, change the “On click action” setting to “Open custom link“. Then add your custom links, one line at a time, in the box below:
