Please note, this guide only applies to websites that have our index grid module installed.
An index page grid makes it easy to group your pages and to create a logical structure on your website.
Here’s an example:

Note that each website we design will look different, but the general concept is that a “parent” page (e.g. Travel) has a series of “child” pages contained underneath it (e.g. Europe, North America, etc). Depending on how we setup your website, the child pages (e.g. Europe) could also have their own child pages (e.g. United Kingdom, Germany, etc).
How do I create new “child” pages?
- In your website editor, go to the “Pages” menu and click “Add New”:

- Create your new page.
- You must choose the “parent” page, i.e. the index page we have setup for you, which this new page will sit underneath. To do this, use the drop-down menu in the “Page Attributes” box on the right-hand side of the editing screen:

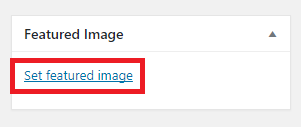
- If your index page grid contains thumbnail images, like in the demo pictured above, click the “Set featured image” link on the right-hand side of the editing screen and choose/upload your picture:
 Note that thumbnails normally display in set dimensions (normally in a square or rectangular shape), so you may need to choose your images carefully. Otherwise, you may find key parts of the image (such as a person’s head) may get cropped off!
 - When you’re finished, click “Publish”:

Please note, to use this system, Primary Image will need to setup an index page for you first, so you can add new pages to the grid yourself.
If you would like us to setup a new index page for you, please get in touch with our support team.

